Showing posts with label geekcraft. Show all posts

Thursday, 9 April 2015

Connecting to an AWOL bluetooth mouse on Mac OSX

If you are like me, you sometimes turn your Apple Magic Mouse off when leaving your computer unattended for a while. The problem is that sometimes it does not seem to want to connect again when you turn it back on. What to do? Without a mouse, how do you open the mouse preferences to reconnect?

One option is obviously to attach some other kind of pointer - a trackpad or USB mouse - and use this. But (a) you might not have one to hand, and (b) that’s rather labour intensive. So, instead, use the keyboard shortcuts:

1. In Finder (use cmd+tab to cycle through to Finder if other applications are open), use shift+cmd+a to open the Applications folder.

2. Select System Preferences using the arrow keys. You might need to tab into the window first. Hitting t will jump you to the first T… application, then just use the up arrow.

3. Open System Preferences with cmd+o.

4. Hit tab to enter the Search box and start typing mouse. The Mouse icon will get highlighted. Hit enter to open.

5. After a few seconds of looking, your bluetooth mouse should be found. Hit enter to connect. Job done!

Sunday, 22 February 2015

The power of iPhone HDR mode

HDR mode was added to the iPhone camera back with iOS 4.1 but being less tech-savvy than I would like these days, I somehow managed to overlook it until quite recently. Last week, we took a holiday in Tasmania, providing some good opportunities to put it through its paces and I must say that I am impressed!

HDR stands for High Dynamic Range and takes three photos at different exposures before intelligently combining them. Sometimes it makes no difference. (Probably often but I only use it when I think it might help.) Sometimes, though the difference is quite dramatic as the following examples show. (Left, normal; Right, HDR.)

An already impressive camera, made even better.

Wednesday, 19 February 2014

37 page views!

The blog hit a landmark today, so I am taking a brief break from grant writing for a quick reflection on the top posts and see how things have changed since my last reflection in January last year. Happily, the top three posts are all (kind of) science/technology related now, rather than the wine/kitten/celebratory/ sex influenced selection before! (I’m a little disappointed that Finding Nemo’s sex-changing father has dropped out of the top ten, though.)

Looking at the "Popular posts this week", the top three of all time are actually not too surprising, being the same top three as this week. What did surprise me was the gap to post number 4, with number 3 having nearly 2000 more pageviews! Here then, for posterity, are the top 3 pages of all time, as of today:

#1. (4002 views)

I’ve had my Macbook Air for over a year now (crazy how time flies) and I still love it. The only drawback really is the limited disk space ...

#2. (4000 views)

I want to preface this post by saying that it’s been one of the harder ones to decide whether to write. On the one hand, it feels a little u...

#3. (2662 views)

Teaching phylogenetics, it is clear that one of the things that causes a surprising amount of confusion is rooting the tree - defining the ...

Monday, 6 January 2014

How to stop Outlook on Mac OSX replacing quotes & apostrophes with superscript numbers

Since switching to a Mac, I have been experiencing an odd issue with Outlook: although in my message editor all would look well, recipients of my messages would often find the apostrophes (’) replaced with a 1 and “” quotes with 3 & 2.

Today, I had had enough and tried to find the reason/solution. The former, it seems, is because Macs have their own version of ISO-8859 encoding, which means that other platforms do not correctly interpret text encoded in this format. The solution is simply force Outlook to use a different "Preferred encoding" in the Composing Preferences - UTF-8 works for me.

Friday, 22 November 2013

Changing file extension associations on a Mac

One of the problems with making the switch from Windows to Mac is that you lose a lot of little tricks and tips that you have picked up over the years. Despite claims that Macs are much more intuitive than Windows machines (something that I have never found, personally), I quite often find myself frustrated at the lack of an obvious way to do something that I know how to do in Windows.

Yesterday, it was file extensions that briefly gave me angst. For historical (i.e. forgotten!) reasons, I have a lot of programs generating *.tdt files, which are tab delimited text. (The correct extension for such things actually seems to be *.tsv, or tab separated values.) Being a biologist, I generally like to open my delimited files to look at in Microsoft Excel - the number one bioinformatics tool in world! (By use, that is!) Naive Macs (and naive Windows machines) do not know what a *.tdt file is, though, so they will generally offer a text editor instead. Similarly, I have a lot of draft notes in Markdown, saved as *.md files, but Finder wants to open them in TextWrangler rather than Mou, my Markdown Editor of choice.

Happily, the internet has once again come to the rescue, in the form of a 2009 post on OSXDaily, Change File Associations in Mac OS X. Simply right-click (or ctrl+click) in Finder and select Get Info.

You can then change the program to open that file with and choose Change All to change the default action for all similar files (e.g. those with the same extension). This was so useful that I thought I would re-share here.

Thursday, 12 September 2013

A review of the "Instant Markdown" eBook from Packt Publishing

If you monitor my Twitter feed, you might have noticed that I was sent a free copy of a Instant Markdown eBook from Packt Publishing to review. I’d not come across Packt before but their general approach looks good - making DRM-free eBooks in multiple formats (once bought, you can get the ePub, PDF or Kindle versions) and paying some kind of royalty to Open Source projects that form the basis of their books. Despite time being a bit limited at present, learning more Markdown is potentially a big timesaver (as I use it a lot now) and it’s a short book, so I agreed.

Unfortunately, the book itself turned out to be rather disappointing. It was indeed quite short - a bit too short. The topics covered were themselves quite useful and it reminded me of a couple of things that I had previously noted to look up. The problem was that they did not really provide any insight that five minutes on Google or, in some cases, even the Markdown Wikipedia article would not match or beat. All too frequently, the content consisted of:

  • XXX: Read about it at <url>.

Screenshots, examples and even descriptions were sorely lacking. Just directing the reader to a website does not really seem enough to me. It’s the kind of thing I might do it my blog, or in a Markdown cribsheet, but not in a book, even an e-Book - especially one priced at £7.64. (Bizarrely, when there are screenshots they tend to be things like login screens, which is rather pointless.)

The lack of screenshots in the intro section could be forgiven as one of the best ways to learn Markdown is just to play with it and see for yourself what it does. Another criticism that I have, however, is that this eBook does not explicitly promote this approach: rather than starting with an online Markdown editor, such as Markable (or one of the other editors mentioned later in the book), the author begins by recommending the download of the official Markdown Perlscript and running it from the command prompt as a starting point.

The other reason that a different approach would be useful is that the book seems to assume a lot of HTML knowledge from the outset. Being a bit of a geek, I generally code my webpages in raw HTML - or, at least, I did before I discovered Markdown! - and so I recognised the HTML code that the Markdown was being converted into. People used to WYSIWYG editors might not be so familiar, especially with tags like <blockquote> and <code>. I am not sure at whom the book is aimed but it seems too superficial for geeks and yet too geeky for non-geeks.

Some of the more advanced features in the Top 8 features section are potentially useful but suffer from the superficial handling mentioned above. A few more screenshots or descriptions would have been useful for tools such as Scriptogr.am and writing Presentations - what do these things look like? Ditto the MultiMarkdown section. For example, the maths section for this is:

Math

Here is a math support example:

   \\[ {e}^{i\pi }+1=0 \\]

I don’t know about you but, at the very least, I would like to know what \\[ {e}^{i\pi }+1=0 \\] actually looks like when converted into HTML and opened in a web browser. For me, this really epitomises the book: it feels like it was lazily knocked out in an afternoon.

There were some useful things here - Pandoc is something I will be playing with and it was good to be reminded of it - but I’m not convinced that it is any more useful that one of the many Markdown guides that are kicking around for free online. (Some of these, almost ironically, are provided in “People and places you should get to know” section!)

The final problem that I had with this book was the lack of critical insight. It will, for example, give the basic code for embedding a picture in Markdown but fail to point out that it cannot be sized or aligned - to do this, you need to insert actual HTML. It will point to a few different tools but not really discuss the pros and cons of using an online versus local editor, for example. When giving the code for inline links ([text](url)) versus reference links ([text][ref][ref]: url), I expected it to point out that the former was clearer and safer if likely to be combining Markdown text from different sources (especially if using numerical references) whereas the latter is better if the same URL is being referenced multiple times. There was nothing like this. As someone who has largely picked up Markdown on the fly, I had hoped to pick up some useful tricks and tips and things to watch out for. I did not.

In summary, this is a handy reference guide to Markdown with some links out to some useful tools that themselves use Markdown. At £7.64, however, this eBook is not worth the money. More informative guides are freely available just a quick Google search away. (The documentation of free Markdown editors like Mou (Mac OSX) and MarkdownPad (Windows) is a good place to start for the curious.)

Friday, 9 August 2013

Expanding Macbook Air disk space with SD cards

I’ve had my Macbook Air for over a year now (crazy how time flies) and I still love it. The only drawback really is the limited disk space - the price you pay for speedy flash storage. This would not be a problem were it not for the fact that I have accumulated a lot of photos and music over the years - far too much for the 128GB disk space.

Initially, I tried to get around this by having all my music on my MacBook but keeping photos on external media. This had two problems: (1) by the time that Apps etc. are included, iTunes was still cramping my space, and (2) it was inconvenient to keep plugging in external media every time I wanted to play with my photos, which, given their state of disorganisation at the time, was quite a lot! The problem was compounded further by iPhoto, which is an horrendous space-waster but useful with Photostream.

Plan 2 was to move my iTunes library to an external hard drive that I could plug in when syncing my iOS devices but otherwise not really worry about. This freed up lots of space for sorting out photos (though not all of them), which in turn allowed me to clean up and delete most of my iPhoto library in favour of using Picasa, which is altogether much more sensible in the way that it organises (and shares) pictures.

The problem with Plan 2, however, was that it made it really incovenient to listen to music/podcasts etc. and even to manipulate playlists and things if I was not entirely stably situated - not to mention the use of a USB port keeping the drive attached.

The obvious solution, which I had considered for a while but delayed due to cost, was to get an SD card big enough for my iTunes library and use this instead. As the picture above shows, SD cards do still stick out a little and so they do not provide the perfect permanent disk expansion that I first envisaged when I got my MacBook - I tried out a 32GB for a while - but they are considerably more securely attached than a portable hard drive, much easier to carry around and free up the USB ports for other things. I got myself a SanDisk Ultra 64GB SDXC card for about £40 and moved my iTunes library onto it. This is clearly more per GB than an external hard drive but pretty reasonable for the convenience - and it is convenient. Access times are pretty speedy and you can go for the Extreme SDXC card if such things worry you.

So far, it’s working out really well and I can heartily recommend it if you have similar Macbook Air storage issues. My only real fear is misplacing the SD card because it is so much smaller than a portable hard drive! As an added bonus, the Mac mini that I have just ordered for work has an SD slot too, so I’ll be able to take my whole library to work if I want to without having to use up valuable HD space on such frivolities! (In fact, it's worked so well that I’ve also ordered a 128GB card for working on both computers, which seems much more convenient (and faster) than using USB devices for the same purpose.)

Monday, 29 July 2013

Making e-Books with Wikipedia

One of the many interesting things that I learnt at the recent iPad training course was not actually iPad-specific: generating e-Books with Wikipedia for offline reading.

Hidden away in plain site on every page is the Print/export section. One option is to simply Download as PDF but a far more interesting and useful possibility exists: Create a book.

Clicking the Create a book link will open up the Wikipedia Book creator, with the option to start a book with the current page or create an empty book.

Once you Start book creator, you then get an Add this page to your book button on each page you visit.

Alternatively, you can right-click and Add linked wiki page to your book to add pages without visiting them. (This is great for those people - everyone? - who gets easily side-tracked by links within Wikipedia pages.)

If you have got yourself a bit side-tracked by adding pages, or just need some inspiration, you can also get Wikipedia to Suggest pages:

Once you have finished adding pages - or want to remind yourself what pages you have added - you can click on Show book and Manage your book. This allows you to rearrange (or delete) your pages and download your book when ready. There are a few options but the best is probably e-book (EPub) format for iBooks.

After selecting a format, click Download and Wikipedia will render the book. Once ready, you can download the file. If doing this on a iPad, you can Open in iBooks, otherwise save it to Dropbox or something and open it in iBooks that way. You then handily have all of the Creative Commons content to read off-line, complete with a nice linked table of contents.

The nice thing about this format is that text will adjust as it is resized etc. Any links between Wikipedia pages that are in your e-book will be included and enable internal navigation. Likewise, any external URL links are kept. Links to Wikipedia pages that are not in the book are not included (i.e. there will not be lots of links out to Wikipedia webpages).

Because any copyright-protected content is not included, the e-book should be OK to distribute - but you will probably want to double-check that before doing it!

Friday, 26 July 2013

Using an iPhone for real world shopping

It’s official - I have become an Apple fanboy. Despite my irritation at their policy of charging seemingly excessive amounts for cable/adaptors to connect their devices to the rest of the world - I nearly wrote “unashamed fanboy” but I am slightly ashamed - they keep finding new ways to blow my mind. (And make me feel old at the level of excitement and amazement it stirs in me.)

Shopping on a mobile device is pretty old school and Apps for online stores abound. What got me really excited recently, though, was the ability to shop in the real world using my phone. The first step on my journey was at Starbucks. I’ve had a Starbucks card and the Starbucks App for some time and finally took the plunge a couple of weeks ago to try and pay with the App - simply tap Touch to Pay and a barcode pops up that can be scanned at the till (if you have credit on your card). No messing about with cash and wallets - indeed, no need to carry my Starbucks card in said wallet. (Not sure why I still do!)

Today, however, I experienced something beyond that, which really took things to the next level. At the iPad training day on Tuesday, the instructor had an Incase Origami Workstation, which I rather liked the look of. (I have posted before that “When it comes to writing, it’s more of an oPad than an iPad” and this could be a solution - a future post will report!)

A quick browse found it cheaper in the online Apple store that at Amazon, so I thought I’d pay the physical Apple Store in West Quay a visit and see if they had it too. They did, so I grabbed one. I wanted to ask about the pros and cons of having an iMac versus Mac mini plus external monitor, so I loitered and ogled/coveted all the beautiful things in the shop for a while. Unfortunately, all the iStaff were busy, so I gave up and brought my potential purpose up to the desk to pay.

Big mistake, really showing my ignorance, that one! You don’t pay for stuff at the desk in an Apple store - it’s just for repairs, as I was informed. I could take it to any of the roaming staff instead. I actually felt a bit annoyed at this and my face might have fallen at that point, for I had been waiting for one of the roamers to become available for a while. But then:

“Or… you could just do it yourself on your iPhone…”

What‽

But yes, it’s true. For fellow ignorami in the futuristic ways of the Apple store: you can buy things in the shop by using the Apple Store App on your phone. No need to even speak to any of the staff unless you want a bag. You just log on to the store WiFi, go to Stores in the App and pick EasyPay, then scan the barcode of your purchase. Confirm with your Apple ID password and you’re away! Your receipt appears on your phone (and gets emailed to you) and the staff get a notification of the purchase, whilst you go on your merry way. Modern technology! Mind blown.

Wednesday, 24 July 2013

Saving your iPad's home button with Multitasking gestures

Today, I attended an iPad training day run by Joe Moretti, which focused on using iPads in education. We explored a bunch of interesting and useful Apps, which I am sure will be the subject of few future posts. One useful thing I learnt, however, was just about the iPad itself.

I often have multiple apps open at once and copy/paste stuff between them or otherwise want to switch from one to another at reasonable frequency. Most people know that you can use double-press the Home button to reveal a bar of recently-used apps that you can swipe through. What you may not know (and I didn’t) is that you can use a single four-finger gesture to reveal this, saving time as well as wear and tear on your Home button. Likewise, a single gesture will return to the Home screen. You can even switch apps directly and bypass the Home screen or multitasking bar altogether. The gestures are in the iPad user guide:

You can use multitasking gestures on iPad to return to the Home screen, reveal the multitasking bar, or switch to another app.

Return to the Home screen: Pinch four or five fingers together.

Reveal the multitasking bar: Swipe up with four or five fingers.

Switch apps: Swipe left or right with four or five fingers.

Turn multitasking gestures on or off: Go to Settings > General > Multitasking Gestures.

It makes me wonder what other useful gems I have missed!

Friday, 12 July 2013

Senseful Solutions: iPhone Email Image Sizes

I often set up draft posts by emailing pictures to my blog to add text etc. later. If, like me, you sometimes email multiple images from an iOS device and wonder what happens to the resolution if you resize it to Small/Medium/Large. Happily, a post at Senseful Solutions on iPhone Email Image Sizes has the answers, some of which are summarised below:

SizePicture (JPG)Screenshot (PNG)
Small320 x 239213 x 320
Medium640 x 478426 x 640
Large1296 x 968
Actual2592 x 1936640 x 960

iPad screenshots are 768 x 1024 PNG files.

Wednesday, 12 June 2013

Blogging in Markdown with Blogger and Markable (on a Mac)

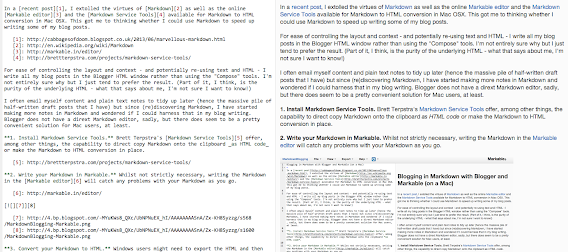
In a recent post, I extolled the virtues of Markdown as well as the online Markable editor and the Markdown Service Tools available for Markdown to HTML conversion in Mac OSX. This got me to thinking whether I could use Markdown to speed up writing some of my blog posts.

For ease of controlling the layout and context - and potentially re-using text and HTML - I write all my blog posts in the Blogger HTML window rather than using the “Compose” tools. I’m not entirely sure why but I just tend to prefer the result. (Part of it, I think, is the purity of the underlying HTML - what that says about me, I’m not sure I want to know!)

I often email myself content and plain text notes to tidy up later (hence the massive pile of half-written draft posts that I have) but since (re)discovering Markdown, I have started making more notes in Markdown and wondered if I could harness that in my blog writing. Blogger does not have a dirext Markdown editor, sadly, but there does seem to be a pretty convenient solution for Mac users, at least.

1. Install Markdown Service Tools. Brett Terpstra’s Markdown Service Tools offer, among other things, the capability to direct copy Markdown onto the clipboard as HTML code or make the Markdown to HTML conversion in place.

2. Write your Markdown in Markable. Whilst not strictly necessary, writing the Markdown in the Markable editor will catch any problems with your Markdown as you go.

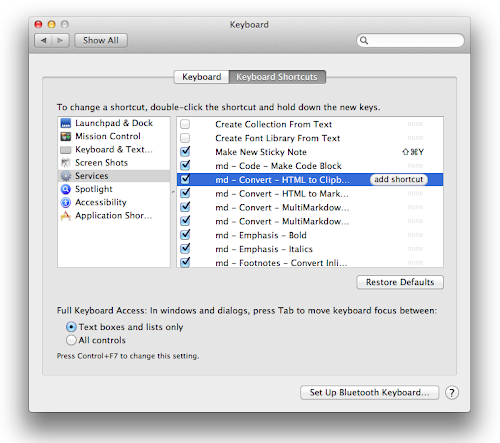
3. Convert your Markdown to HTML. Windows users might need to export the HTML and then open the file in a text editor to copy and paste into Blogger. On a Mac, with the Markdown Service Tool, it is a bit easier - although, sadly, not quite as easy as I had hoped. The Service to use is:

md - Convert - HTML to Clipboard

Unfortunately, this does not seem to be available for highlighted text in the Markable window. Instead, there is the need to first copy and paste the text to a regular text window. This is not so bad, as the regular Blogger window itself will do. You then need to use the conversion service and paste back into the Window. Alternatively, just use:

md - Convert - MultiMarkdown to HTML

This will convert the text in place. You can either use the Services menu item (or right-click), or you can setup a Markdown Service Shortcut to do it all with the keyboard.

4. Make sure that line breaks are used. One thing I noticed when converting the HTML is that it (sensibly) uses paragraph markers. If, like me, you use Blogger’s capacity to Press “Enter” for line breaks, you will need to change this. (The laziness and readibility this option enables are not needed when using Markdown anyway.)

5. Add pictures, tidy and post. With the main text, links and formatting in place, it is now a simple case of adding the pictures, tags etc., giving the post a quick preview (and tidy if necessary) and unleash it to the world. The added benefit, of course, is that you have an extra copy of your post saved in Markable in case anything goes wrong.

Disadvantages

As well as the line endings issue, there are a few disadvantages of doing things this way. One problem is that if you Preview a post and then spot an error, you have three obvious choices, none of which appeals:

  1. Edit in the Blogger window, which is easy, but then have different Blogger and Markable versions of the text.
  2. Edit in both Blogger and Markable.
  3. Edit in Markable and then repeat the text copy and conversion process.

The latter is obviously the best if the changes are large but what if you have already added extra pictures and things?

One solution is to convert your HTML back to Markdown to continue editing.

md - Convert - HTML to Markdown

This has pros and cons. One pro and con is that the new Markdown does not necessarily look like the original. This can teach you new Markdown but might also confuse!

The picture placement and formatting also does not remain quite the same and may need re-jigging once the Markdown to HTML conversion is repeated. This only seems to be a problem for left/right-aligned images, though. It's also a fairly easy way to get images into Markable files, if that is your goal!

It may not be suitable for every post, and there is a good chance I will end up going for tweaking option 1 (abandoning the Markable version) in most cases, but it could prove a useful way to write posts with a lot of links and formatting. If nothing else, it's another good way to develop some Markdown skills.

Saturday, 8 June 2013

Marvellous Markdown

Another positive outcome of the recent Software Carpentry boot camp was the excuse and opportunity to get a bit more to grips with Markdown. This is really useful pseudocode that retains a high degree of human readability in plain text form, whilst being easily converted to HTML and other rich text formats. I'd already used it a bit for some of my content on the University of Southampton Computational Modelling Group website but I'd never fully realised its flexibility, value and potential until I started writing README files in it.

I won't try to explain Markdown itself here. The Wikipedia article is pretty informative if you want to know more. Instead, this a quick post to highlight/bookmark some useful Markdown tools that I've come across.

Markable

The first is the Markable website.
Markable top
This is great if you just want to try your hand at a bit of Markdown and see what the HTML conversion would look like. Simply type your text in the online Markable editor and the HTML window will automatically update to reflect the changes! You can then copy the Markdown to the clipboard or export Markdown/HTML to a file.
Markable bottom
If you see yourself using Markdown a lot, as I now do, you can register and take advantage of a whole bunch of other tools, such as (auto)saving content to work on later or exporting the Markdown (or HTML) directly into Dropbox.
Markable screenshot of Python Markdown info

Markdown Service Tools

Of course, if you are like me then saving to HTML code might not be enough for you. You might want to see the HTML code and/or copy it for use elsewhere. (I write all my blog posts in the HTML editor, for example.) On a Mac there is the tremendously useful Markdown Service Tools by Brett Terpstra that, among other things, includes tools for precisely this. Simply download the zip file, unpack and then copy the relevant *.workflow files to your OS X System Service folder:
~/Library/Services/
(Brett has a description of how to install Services here. You might have to make the Services/ folder first - I did.) This makes those services available via the Services menu item (or right-click → Services) across a range of Apple applications. My favourite so far is the "md - Convert - HTML to Clipboard" service, which converts highlighted Markdown text to HTML and copies it directly onto the clipboard. In combination with the Markable editor, I think this could be really useful.

Python-Markdown

It's worth quickly mentioning that there's a Markdown Python library, if for no other reason than that is appears in the Markable screen grab above! This can be used for easy conversions between formats, which might be handy for coding up batch conversions of *.md to HTML README files etc. I really need to save this one for another day as I am still getting to grips with it and working out how/where it can be useful for me.

Wednesday, 5 June 2013

Six useful things I have learnt at Software Carpentry boot camp

Monday and Tuesday this week, I attended a Software Carpentry boot camp at the University of Southampton. Topics covered included bash, shell scripting, Git and writing/testing reproducible code. The event was well-attended and whilst making an event like this relevant to everyone is obviously a challenge, they did a great job. I certainly learnt some useful tips even for the topics that I knew a fair bit about.

As well as the SWC presentations themselves, it was good to get tips from fellow programmers as well as "UNIX and Perl to the Rescue!: A Field Guide for the Life Sciences (and Other Data-rich Pursuits)", which I brought along for some browsing. Here is half a dozen random things that I picked up over the two days...

1. Useful grep flags. I've used grep to pull out matches from text files a fair amount and was familiar with a few of the flags that I use a lot:
-i = case-insensitive search
-v = inverse search
-A n = return n lines after match
-B n = return n lines before match
I learnt a few more useful ones, though:
-w = match whole words only
-n = show line numbers
--color = highlight matches in colour
-r = search subdirectories (recursive)
2. Useful ls flags. ls is another must-have part of the UNIX users toolkit. There were still a few useful flags with which I was unfamiliar and am likely to use in future, though:
-G = colour-code directory contents
-F = appends / to directories
-R = recursive ls including subdirectory contents
-1 = one entry per line
-a = show all files including hidden files
Along with my old favourites, of course:
-l = "long" mode (more info)
-r = reverse sort
-t = sort by time
-S = sort by size
-h = user-friendly file sizes
3. Catching the standard error and standard output. I've seen this a few times but for some reason this was the first time it really sunk in. Most UNIX users will be familiar with redirecting the standard output from a command into a file using > file (or >> to append). Catching the standard error is less obvious/common. This can be done using 2> to catch the stderr alone, or &> to catch both stdout and stderr at the same time. If you want to redirect them both into different files, do something like this:
[cmd] 2> error.txt > stdout.txt
The stdout will slip by the first redirect and then get caught by the second. Of course, you can have those the other way round if you wish!

4. Navigating the terminal. This one actually came from "UNIX and Perl to the Rescue" but I discovered it at the boot camp:
Ctrl+a = move to start of line
Ctrl+e = move to end of line
Ctrl+w = delete previous word
Ctrl+l = clear screen (clear works too)
Ctrl+r = search through previous commands one letter at a time (this was an SWC revelation)
Using Ctrl+a and Ctrl+e seems to work in a number of other Mac editors too - including this blogger HTML window! If you are a Mac user, just make sure that you don't use cmd+w by mistake - this will close the current terminal window with much wailing and gnashing of teeth!

5. Reversing Python strings. In the past, I have reversed a python string by converting into a list, using the list.reverse() method and then string.join() to convert it back. But there is a better way!
string[::-1]
I've used string slicing loads before but never realised that you could add a step to this syntax as with the range() method! (string[::-1] translates as string[start=end:end=start:step=-1].) Now I am wondering where else in my code I can use this knowledge!

6. Changing the command prompt to $. Sometimes, the command prompt is too long (or the terminal window too narrow) so that almost every command wraps around in an annoying fashion. To replace with a simple $ character, just type:
PS1="\s"
PS1="\$ "

I must admit that I do not (yet) really understand exactly what this does and how it works but it does! (And if you now get lost as to where you are, just remember that pwd gives you the full path to the working directory.

There were more but I think that's enough for now! If this is the sort of thing that floats your boat, you can find useful stuff like this plus a whole bunch of lessons at the Software Carpentry website:

If you get the chance to attend a boot camp yourself, my advice is: do!